Acoustic B100 Bass Head Rescue

Acoustic is a brand name owned by a national guitar retailer chain.  As far as I can tell, they are build in China and very few spare parts are available here in the United States.  This bass head was pulled out of a damaged cabinet.  The national retailer wouldn’t honor the warranty.  The ChiComs just want to sell stuff, not support it.  Can the Unbroken String Crew strike a blow for Truth, Justice, and the American Way?

Rather than use an attenuator switch, the user selects an input appropriate for his/her instrument and plugs in here.

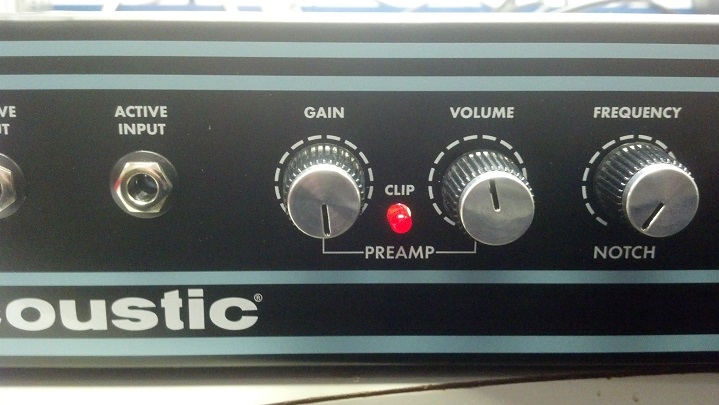
Some bass amps separate the gain and volume knob.  I really like this setup.  The notch is handy for feedback control.

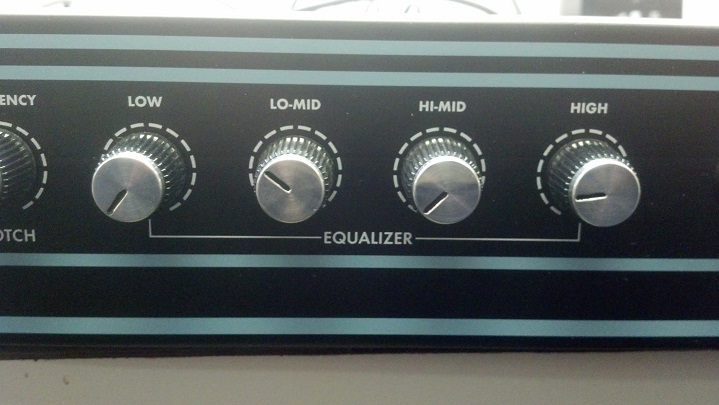
The split mid-frequency EQ is an interesting option, although (spoiler alert!) once I got this amp running and it worked well, I really didn’t get a lot of benefit from this.  Maybe you five and six string bass people can weigh in on this feature.

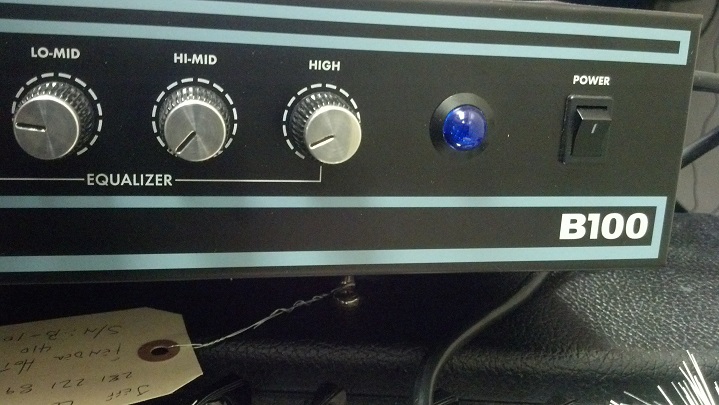
The big blue pilot light was visually interesting and bright.  I can’t say it went well with the paint scheme, though.
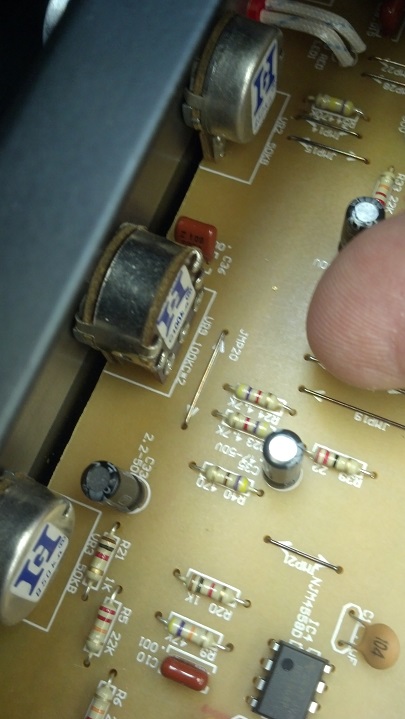
No audio came through the amp.  A quick inspection and a little poking around yielded pay dirt!  The audio signal always manages to go through the volume control, and, sure enough, the volume control was Ground Zero for the problem.  The circuit board underneath the control was somehow intermittent.

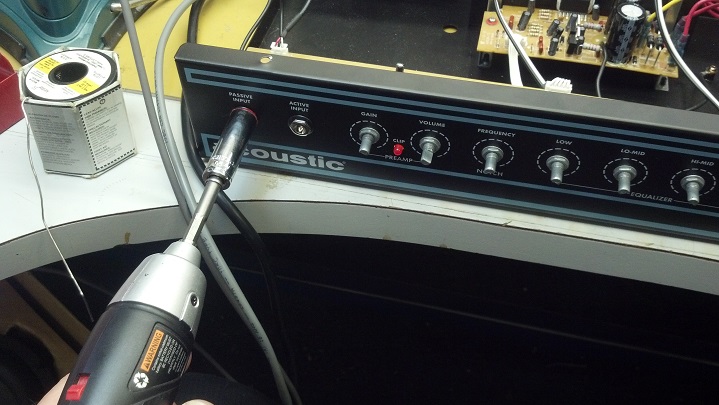
Accessing the underside of the printed circuit board involves removing the front panel circuit board first.  Here, I’m using an electric screw driver with a socket attached to finish the job within my lifetime.  The face of the socket is covered with felt to protect the face of the amplifier.

The cable to the left takes care of the audio from the front panel preamplifier circuits.  The white cable in the center is power and ground.

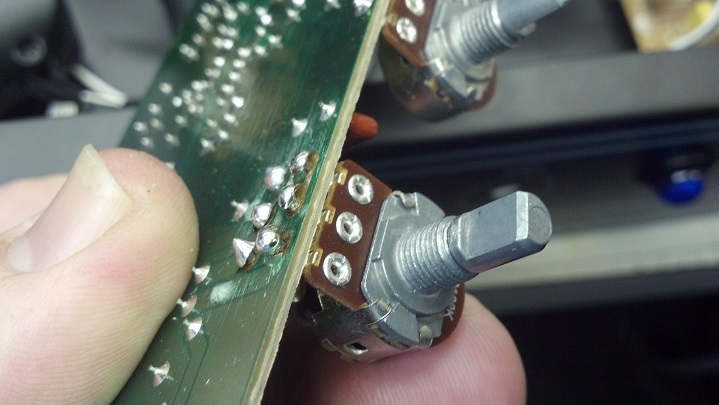
When the amplifier cabinet was damaged, the volume control took the brunt of the shear motion.  The circuit board traces separated from the laminate.  Thus, our electrical connections were intermittent because the circuit board foil is not very rugged.  This is why point-to-point wiring Rules!

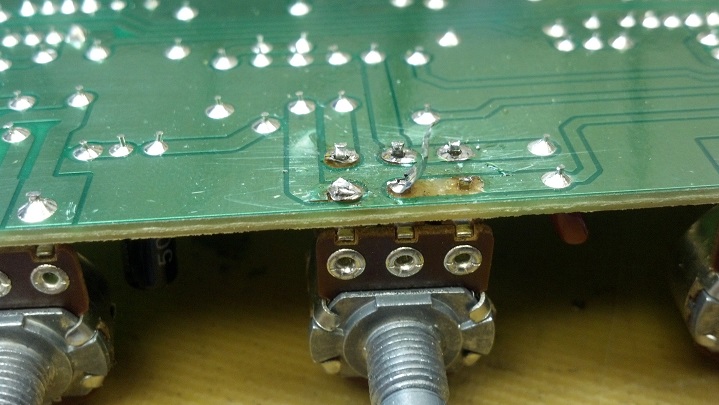
The solder is removed, leaving what’s left of the circuit board copper foil exposed.  Now copper wire will be routed around all the points in the various nets around the volume control to complete the circuit with something a little more robust than foil.

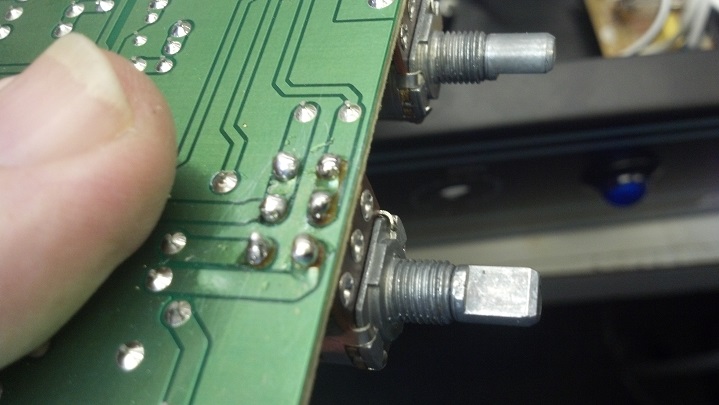
A little too much solder, which I will go back and fix.  But the nets on the board are intact and continuity is good.

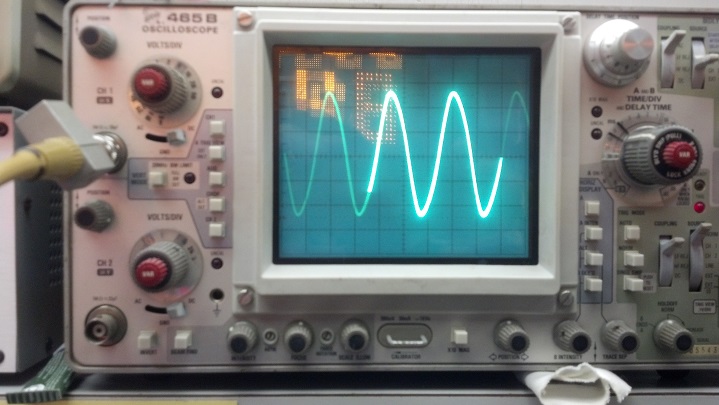
Back together and up on the air!  You are looking at 97 watts into 4 ohms at about 41 Hertz.

The Acoustic line is difficult to service because of the dearth of service information.  But if someone knows their way around the usual amplifier topologies and can isolate the problem to a specific area, repairs are possible.

Thanks for reading all the way to the bottom!

Contact: David Latchaw EE

281-636-862

Octal Tube Base Replacement Experiment

This fine old 6V6 tube tested good, but the base was mechanically loose from the glass envelope.  Will the Unbrokenstring Crew be able to salvage this fine old Made In U.S.A. specimen?  Let’s find out!

Let’s unsolder the internal wires from the tube base.  These foam pads will protect the tube from the jaws of my vise.

To get the wires back in the right pins, I added an index mark on the socket and on the glass envelope.  The permanent marker is not permanent on the glass nor on the bakelite base, so we need to be careful not to wipe it off.

Once the solder is removed from inside the pins of the tube base, the envelope is easily separated.  Here you can see the glass neck that allows the air to be removed from the inside of the glass envelope, at which point the glass is heated and the neck is sealed.  The silver inside the glass envelope is from flashing the ‘getter’ to remove the rest of the oxygen and water from the tube envelope.

The glue used ‘back in the day’ varied by manufacturer.  It consisted of partially organic, varnish, rosin, and ground glass as a filler.  The finish on Stradavarius violins was not much different!

This chemical soup is pretty good stuff, as you can see that it is still adhering to the glass after half a century.  Not many modern adhesives can attest to that sort of performance, particularly where the difference in thermal expansion of the adhered materials is so different.

In this picture, I have soldered temporary wires which shall serve as extensions of the leads of the tube.  This will permit each lead to be aligned with its pin while the tube socket is reassembled to the glass envelope.

This is a little better view of how the extensions work.  Each blue wire is threaded into the corresponding pin as the tube is partially reassembled.

From 1950 organic adhesive, rosin, and ground glass, we progress to the 21st century.  This high temp gasket maker is designed for operation to 600 degrees F and low electrical leakage, suitable for automotive sensors.

The plan is to ensure glass-to-socket coverage of red RTV, with some additional red RTV inside the tube socket for mechanical strength.  I don’t want to get a lot of red RTV around the delicate glass neck, either.

Now we are ready for the big Red Squish!

We should have good red RTV coverage now!  The mess can be cleaned up later.

I left a fillet of red RTV around the top of the tube base.  Does everything look straight to you?

Our victim is left to cure overnight in a yoga position, to assure that the red RTV is intimate with the chakra.

We’re back in the clamp again, this time to remove the blue wires and resolder the original leads inside the tube pins.

The extensions are 30AWG wire wrap wire;  so small that just a touch of the soldering iron is enough to remove them.

Each pin is partially filled with solder with enough heat to assure that the internal leads are well-secured.

The transconductance of this tube is identical to what was measured before the base was replaced.  No electrical leakage current was measured from isolated pin to isolated pin using a capacitor leakage checker of the Heathkit IT-28 Capacitor Checker.  Then I installed this tube in my Gibson GA-30 for a final test.  Sounds good!  Takeaway from all this:  Don’t pull on the glass envelope of a tube when removing it from a socket!  Pull on the tube base.

Thanks for reading all the way to the end!

Contact: David Latchaw  EE

281-636-8626

University Sound Speaker Columns

I picked up a pair of these loudspeakers on eBay a few years ago.  I was intrigued by the line array concept, plus these were architectural loudspeakers that could be used out-of-doors if kept out of direct rainfall.  Just the thing for the sound at outdoor shows for my dancing group, The Rhythm Cloggers of Houston, Texas!  However, the foam behind the metal grille was shot.  New foam was ordered.  With the company Christmas party coming up, it was high time to get these loudspeaker cabinets squared away!

The grilles are held on at each end with these U-shaped aluminum corners.  Off they come.

Each end of each loudspeaker is identical.

Yuck!  The old foam had oxidized and crumbled away to nothing.  This won’t keep the rain out!

This is something that should NOT be done on the carpet.  I took these out to the shop because the concrete floor is easier to clean.

Removing the old foam from the grille is trivial.  However, a respirator is needed unless you want to cough for a month.

What attracted me to these line arrays is that the loudspeakers themselves are tilted in the same manner as a Fresnel lens focuses light, although the lens itself is physically flat.  The idea is to ‘focus’ sound in a horizontal plane, rather than let it spread up and down in a spherical manner in accordance with the inverse square law.

In a mobile DJ setup, I wanted to use Neutrik Speak-On connectors.  These screw terminals are fine for fixed, architectural applications, but were not what I wanted to gig with.

The internal wires are retained, and the old terminals are just snipped off.

New plates are fashioned from standard electrical junction box plates.  The hole for the Neutrik Speak-On is already drilled.

Here is a close-up of the new connector.  It’s really hard to confuse one of these with a quarter inch phone jack, which is a real positive when setting up in a hurry under less-than-ideal conditions.

The backsides of the grilles were sprayed with clear automotive headliner adhesive, then the new foam was smoothed into place.  The new foam was cut over-sized from a roll, so there was plenty of leftovers that required trimming.

A sharp Exacto knife works well to trim the foam.  This is the same foam I used in an earlier post to replace the wind screen in a Shure microphone.  This stuff is handy to have around!

While I had the units apart, I checked the wiring to learn a little bit more about how this line array works.

Here’s the new audio jack installed in the electrical junction box cover, now painted black.

The old wiring is now soldered to the jack from the back.  “Steel City” for heavy metal music, maybe?

A little heat shrink tubing adds physical support to the solder joint, as well as adding some electrical insulation.

The edges of the grilles are supported by some aluminum channel.  When we reinstall the U-shaped aluminum ends, we’re done here. Let’s try it out!

The University Sound Speaker Columns are hard at work behind the scenes at the Spectrum Scoreboards Christmas Party.  These ran all afternoon, driven by a one hundred watt powered mixer that you can see to the right of the fire extinguisher.

Thanks for reading all the way to the bottom!

Contact: David Latchaw EE
281-636-8626

DigiTech Screamin’ Blues Pedal Refurb

Jim purchased this used pedal from a national retailer.  It worked at the store but not at home.  He took it back and the national retailer wanted him to buy a new pedal.  Could the Unbrokenstring Crew help?  Check It Out!

This pedal is absolutely mint;  No sign that it had ever been used.  We hooked it up and it was non-functional on internal battery power, but worked perfectly using an external pedal power source.  Well at least the electronics work!

Let’s put a new battery in it.  Oops, when we pulled the battery, this corrosion was all we found.

Everything is made in China, but could we at least use a name-brand battery that wasn’t dented, Mr. National Retailer?

We loosened up the nuts on the jacks and removed the case screws.  Fortunately, the electrolyte did not leak very far.

Here is a view of the top of the circuit board.  We can easily replace the battery clip leads and get this back on the air!

While we’re here, let’s indulge in a little Tech Porn.  The printed circuit assembly is a nice mix of modern surface mount parts and quality film capacitors, with some small electrolytic caps where it makes sense to use them.

The circuit side of the board is uninteresting unless you are into this sort of thing.  Those are some tiny vias!

The red and black wires on the left are the battery leads, which will be de-soldered.  The long potentiometer shafts reach all the way through the top of the unit and out where the user can reach the knobs.

Another view of the top-side printed circuit board assembly.  These battery leads are coming off now.

The battery leads are unsoldered.  This unit was built with high temperature lead-free solder, but poses no problems for rework such as we are doing here.

Meet the new battery clip.  The case of the pedal has been clam-shelled around the circuit board assembly and we’re installing the screws and connector hardware.

The nuts on the jacks are tightened by hand with a socket.  A layer of felt glued to the socket prevents damage to the finish of the pedal.

The knobs press on, no setscrews.

The foot pedal lid was reinstalled and the unit tested fine with the battery.  Moral of the story: Buy name-brand batteries and don’t leave them in the unit and forget about them!


Thanks for reading all the way to the end!

CONTACT: David Latchaw  EE

281-636-8626

Intermittent Ampeg SVT-200T Bass Head Problem

Billy complained that, while he was rockin’ steady with his bass line, the sound from this bass head would come and go.  Other people had looked at it and didn’t fix it.  Could the Unbrokenstring Crew look at it?  You Betcha!!

Let’s take a quick look around before we dive into this project.  The rear of the unit is dominated by a huge aluminum heat sink.  To one side is the output panel, which shows the considerable versatility this amp offers.

On the other side of the heat sink is this panel, handling the power in and out duties.

WARNING – TECH PORN  This interior view shows the power transformer in the lower left corner, the solid state full-wave bridge rectifier, filter caps, drive circuitry, and output power transistors.  Along the top is the circuit board for the front panel controls.

This view gives a more complete view of the heat sink and power transistors.  This layout is very clean and functional!

We quickly identified an intermittent internal switching contact in one of the input jacks.  Here, we are removing the knobs and nuts from the front panel controls in order to better access all the jacks and clean them.  If you look closely, you will see a piece of red felt glued to the face of the socket.  This felt keeps the socket from scratching the front panel.

From here, you can easily see the switching contacts on the input jacks.  The dimpled leaf touches the contact whenever no plug is inserted in the jack.  When a plug is inserted, the dimpled leaf is displaced away from the contact.  More often than not, a signal necessary for the proper operation of the circuit is routed through this contact.  The surface of the metal that makes this contact can easily be contaminated with dust or cigarette smoke and can become intermittent.  The jack closest to the camera was identified as intermittent during testing.  All the jacks in this unit will be cleaned, as they are all the same age and have been in all the same places as the one which is acting up.

The circuit board is inverted so that the liquid from the TechSpray can will run down into the contacts that are causing the problem.  The rag is a vain attempt to limit the size of the mess, but it does a pretty good job of catching the gunk flowing out of each jack.

More nasty proof of the validity of the diagnosis.  But if you compare how bright and shiny the metal is on the switches of the jacks to the earlier pictures, you can say that we are making progress against the Forces of Dirt!

I cut a strip of white typing paper (that’s copy machine paper for those of you born after 1980) that is just the same width as the switched contacts.  Each contact was cleaned and burnished by pulling the paper through the contact mating surfaces.  Most reliable switches and relay contacts meet with a ‘wiping’ motion that helps keep them clean.  These contacts just meet and separate when plugs are inserted and removed, and do not experience the same wiping motion seen in switches and relay contacts.  When I become king, I will have all these jacks redesigned, and I will have only clean, dry air circulated around expensive electronics.

Now we reassemble the head so that it can be tested.  Here is another one of my sockets with the red felt on the open end.  I learned this trick at the Space Center as a strategy to protect aluminum anodized Orbiter components.

We’re ready to retest on the bench.  Both input jacks, effect loops jacks, and output switching jacks will be tested.  After an hour at full power, the heat sink barely gets warm.

I wanted to show some detail of how the cabinet goes together.  This is a fabric-covered insert which goes in the front face of the amp head, beneath the control panel.  It is not held in place with screws at all, as you will see.

This panel is held in place with extreme super extra-heavy duty, industrial/commercial grade Velcro hook and loop fasteners.  You can see here that the loop fasteners are held to the filler panel with a screw.  Yes, it’s that strong!

I also want to document a literal ‘snag’ for you, in case you ever work on one of these.  See these screws that hold the carrying handle in place?  They do an excellent job of holding the handle in place.  However, they keep the internal chassis from sliding in and out of the cabinet freely.

Here’s why.  They are just long enough to stick down inside the cabinet.  When attempting to remove or install the chassis from the cabinet, be sure to back the two handle screws out a couple of turns so that they do not snag the chassis.

Here is that Velcro in action.

All done!  Billy intended to sell this amp after the Unbrokenstring crew repaired it, but he likes it so much that he will keep it instead.  This head sounds AWESOME with his six string bass.  This is a very versatile unit with a straight-ahead solid state sound.  And you can still buy them new!

Thanks for reading all the way to the bottom!

CONTACT – David Latchaw  EE

281-636-8626