Cool Sunn Practice Combo Amp Blows a Fuse

The fuse blew in this Sunn Stinger 20, but the new fuse blew as well. Then, it quit working for good. Cool Under Fire wanted this combo amp back in action. Could The Unbrokenstring Crew sort it all out?


Our patient still has that cool Sunn vibe after all these years, even if it doesn’t work.  That name badge is recognized by all.


Getting up close and personal to the front panel, we see an input jack and three tone controls.


Independent Gain and Volume controls show that this unit means business!  The mute button and headphone jack give this amp a family-friendly advantage over other inexpensive practice amps.


As is found on many guitar amps, the cabinet is sealed with a closed back.


Oh no!  The sticker says “DO NOT OPEN.”  What are we going to do?


We open it, of course.  How long has it been since you’ve seen a loudspeaker with a square magnet?


Obviously this is a four-ohm loudspeaker.


The steel chassis has circuit boards for the preamp functions, just behind the controls, and power supply and audio power amplifier at the rear of the unit.  Nothing appears out of order here.  No, wait!  Look here!


This wire has come un-crimped from the terminal, seen in the background.


We can just open this terminal up a bit, re-insert the wire, and solder it in place.  But the question remains:  Could this have been the reason that the unit blew fuses before it finally quit permanently?  I don’t think so.


While we’re waiting on a copy of the Sunn Service Bulletins for this amp to come via email, let’s take a minute to clean this unit up.


The controls hold the front edge of the circuit board in place, and a couple of screws hold the back edge steady.


The headphone jack is entirely isolated from the chassis of the unit.  Even though the chassis is wired to the green wire safety ground in the AC cord, taking measures such as this makes the UL Certification easier.


The input jack is shielded from interference with this metal bracket.  This kind of additional shielding is almost never done on inexpensive amps…  this Sunn is definitely a Cut Above!


The switches and controls are easily cleaned now that they are easily accessible, as shown here.  The Unbrokenstring Crew NEVER forces cleaning fluid around the shaft of the potentiometers as a cleaning procedure, because dirt and old lubricant is forced inside the control.  It cannot end well.  Sorry, StewMac.


With all the hardware out of the way, it is a trivial matter to clean up the face plate.  Gibson Guitar Pump Polish is pressed into service for this step.


Reassembly also involves tightening the woodwork.  Over time, wood shrinks (even in humid South Texas) so most amplifier cabinets will develop buzzes and rattles as they age.


Maybe if we work quickly, the “Do Not Remove” police will not catch up to us and put us in jail.


The Service Literature arrived!  It states that the next-higher ampacity of fuse should be used in this unit;  There was an error at the factory wherein units in this serial number range had an inadequate fuse installed!  This little amp has run for hours with no issues!

Thanks for reading all the way to the end!

CONTACT – David Latchaw EE
281-636-8626

A Journey To Planet Unobtanium – Yamaha 50-112 Combo Guitar Amp

A secret weapon of many an acoustic and jazz artist, this mid-seventies line of Yamaha solid state amps were well-regarded among those few who knew about them. This like-new specimen had been suffering from a strange ailment, then went mute. Could the Unbrokenstring Crew revive this unit?

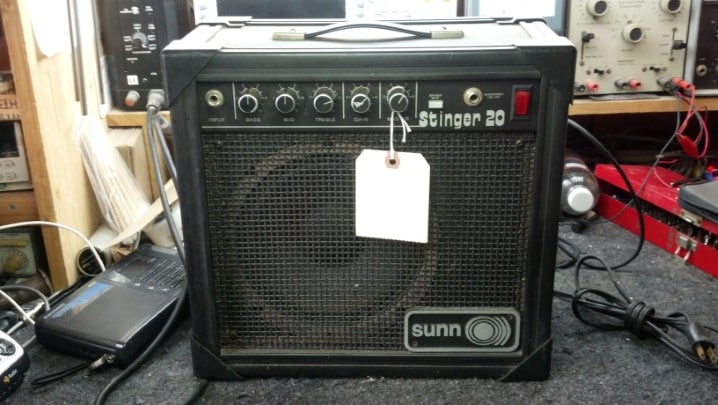
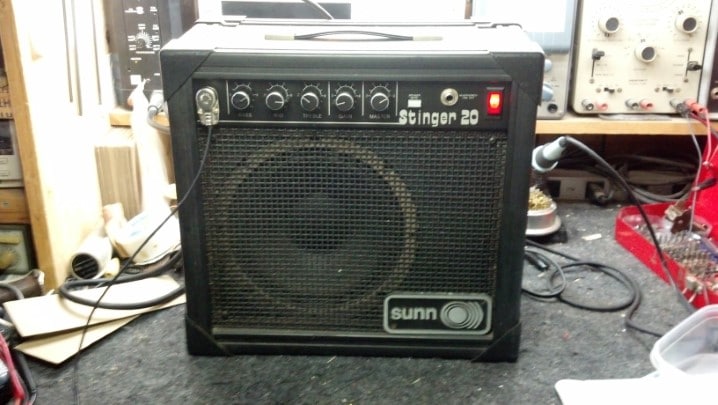
On the exterior, this amp was in very good shape considering that it had been built forty years ago!


Starting our tour, the power switch combines the ON/OFF function with the AC polarity reversal switch seen on many tube amps of the same period.


The high and low level input jacks are typical for the era.


The tone stack includes a ‘bright’ function, a precursor of the ‘presence’ control seen on amplifiers today.


The presence of the reverb function demonstrates that this is an early unit.  Many of the later ones did not have a reverb tank at all.  The distortion function is an attempt to add ‘fuzz’ and is nothing like the metal/shred distortion heard today.


A few attempts had been made over the years to clean the controls.  Unfortunately, the lube spread onto the front panel around the controls.  Yuck!


The open cabinet is clean and functional.


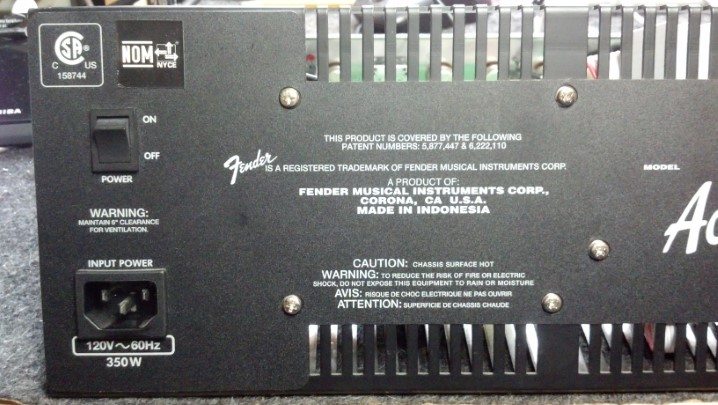
We have the usual name-rank-serial number information here.


We have two unmarked jacks.  What in the world?  But we see foot switch jacks which are not out of the ordinary.


Both the AC power into the unit and the DC power to the final amplifier block are externally fused.


And, we have a QC sticker!


Removing one of the rear baffles reveals the solid state amp and gives us access to the chassis.


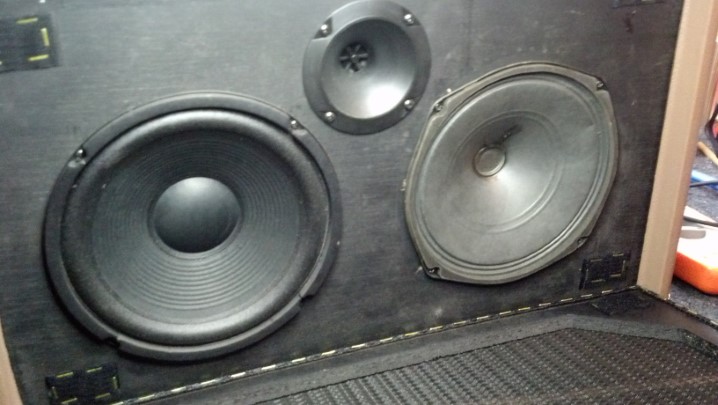
Obviously the original loudspeaker, the response graph demonstrates the heritage of this unit to the high fidelity world that Yamaha dominated in the 1970s.


This ground lead connected the chassis of the amplifier to the frame of the loudspeaker.


With the chassis out of the cabinet, we see a reverb tank in the foreground, a power transformer to the right, big capacitors in the center, and a mono-block amplifier to the left rear.


This strain relief for the AC power cord is really over-the-top!


The black, finned heat sink is the foundation upon which the power amplifier is built.


This large electrolytic filters the DC power for the amplifier, which is nominally 80vdc.


This electrolytic capacitor is in series between the amplifier output and the loudspeaker.  This amplifier’s circuit topography shifts the DC operating point of the amplifier to one-half of the DC power supply voltage, effectively forming a class AB amplifier using a single power supply.  This capacitor passes the audio current to the loudspeaker while protecting the loudspeaker from any DC current.


Underneath the chassis we find this fused, low-voltage power supply which supplies floating DC voltages for the circuitry.


Remember those two unmarked jacks on the rear panel?  Someone added them so that a quarter inch cable can be connected to another quarter inch cable.  Yes, this is a home-made 1/4″ mono to 1/4″ mono jack adapter/coupler.


Here is the bottom side of the two large electrolytic capacitors we saw up top.


More fuses and bypass capacitors are visible here, in vinyl tubing, to shroud the terminals from touching something they shouldn’t.


The ON/OFF/ON switch is seen to the right and the Power ON indicator lamp, with limiting resistor, are seen here.


Look at the thick steel shield that keeps any signals running around the inside of the amplifier away from the input jacks!


While we’re here, let’s service the unit.  Jacks are cleaned with De-Ox-It.


This circuit board handles all the signals surrounding the front-panel potentiometers.


These controls will be properly cleaned and re-lubricated.  And we can clean that nasty front panel while we’re here!


After removing two large bolts, the power amp assembly lifts off.


The six pin connector handles power in, signal in, and amplified signal out duties.


Inside this assembly, we see all the components for a transistor-based solid state power amplifier.


A pair of these transistors handle the power amp duties.  The screen separates everything from the collector of the transistors, which are at +80vdc potential.


This screw under the little bump in the sheet metal holds a temperature-compensating diode array in close contact with the heat sink.  This diode array provides temperature compensation for the transistorized amplifier.


Note that this module is stamped 50W/8 ohms.  The Japanese think of everything!


With the cover removed, we can see the inner details.


These low-level driver transistors are pure unobtanium, which means that if they are bad, there is no modern direct replacement.


Fortunately, all of those low-level driver transistors appear to be OK.  The curve tracer indicates that this is a PNP device.


This is another bit of pure unobtanium.  Three silicon diodes with special forward voltage characteristics over temperature are housed in this component.


This diode array appears to be functional for now.  These are HIGHLY SOUGHT AFTER by techs who rebuild those 1970’s era Kenwood and Pioneer stereo receivers.


Every component will be checked, including the power transistors.  Replacements are available for these, if we need them.


Almost every component will be removed from the circuit board and verified against the schematic and the markings on the device.


This capacitor was more than 30% low in capacitance, and will be replaced.  (No, the leads are not touching.)


With the power amp assembly back together, we can perform some initial setup of voltages and levels.


One of those two big power transistors with the copper-colored tabs is intermittent.  Can we find a matched complimentary pair to replace them both?


Yes, after some research, an adequate replacement was ordered.  Whew!


Here they are, those black boxy devices in the center of the picture.  I marked the collector pin locations with a C and the base pin locations with a B on the circuit board so I could get the new parts in the right place.


OK, now we’re cooking.  The center yellow trace is a signal called C.VOLT on the schematic, and represents the voltage value of the midpoint of the DC power supply.


Over a few hours, the value of C.VOLT changed, creating bad distortion.  Look closely at the green capacitor at the top of the picture.  Can you see something ‘wet’ on the circuit board under it?


That ‘wet’ looking stuff is similar to contact cement.  The Japanese used this stuff extensively in the 1970s to secure electronic components so that they did not come loose from the circuit boards when shipped to the United States and elsewhere.  Over time, this ‘stuff’ becomes conductive, which will upset circuit operation.  Many a Japanese-built bit of electronics, including televisions and Ham radios, were taken out of operation by this stuff.


The site where the green capacitor goes has been cleaned.  This needs to be repeated for any ‘stuff’ remaining in this unit.


Here is the C.VOLT test point.  The crusty brown stuff is solder flux, which will also be removed.

I uploaded a video of the working amplifier to YouTube, which then blocked the video and hit me with a take-down notice about a minute after I uploaded it.  The audio content of the video was copyrighted, and I was caught.  Don’t you just love YouTube/Google/Facebook?

Thanks for reading all the way to the end!

CONTACT – David Latchaw EE
281-636-8626

Phonic 1500 Rack Mount Stereo Amp Repair and Update

Billy was running this amp as part of his PA for years until one channel quit.  Could the Unbrokenstring Crew bring this inexpensive amplifier chassis back from the e-waste pile?
To some folks, Phonic and Professional do not belong in the same sentence.  But this unit has been working very well behind the scenes, for more years than many of its Brand Name Brethren have been working.


Simple controls on the front.  Cranked to eleven, of course.


It doesn’t get much simpler than this.


Billy asked to have an IEC power cord installed on this when (not if) we fixed it.


The Neutrik power connectors are a nice touch, almost required at higher power levels.


Inputs are either balanced quarter-inch TRS or XLR connectors.  The usual set-and-forget controls are found here.


The power transformer seems adequately-sized for this power level.  AC-to-DC duties are performed to the lower right, and one audio channel is seen between the transformer and the aluminum heat sink.


With the unit turned around, the other audio channel is found here.


The front panel controls are here.  These potentiometers will get a million-mile cleaning and lubrication.


The dark charcoal-colored ribbon cable connects signals to the two audio channels.  The flat ribbon is Just The Thing here, because it does not block the path of cooling air into the unit.


The electrolytic capacitors are bulged, which is not unusual for a unit that has seen this many years and this much use.


These electrolytics will be replaced.


These rectifier blocks are wired in parallel.  Yeah, Baby!


I was kinda wondering where the line fuse was located.  It’s under this bundle of cables.  Yes, that says 30A at 115VAC.


Before the unit comes apart, I need to document where all these cables go.


These cables need to go back where they started.


Behind the colorful bundle in the foreground is the circuit board that connects the rear-panel output connectors.


I need to remove the larger circuit board to get to the solder-side of the PCB.  The dirty little ribbon cable comes off first.


These output cables come off next.


And now, we begin.  There are about thirty screws that hold the circuit boards in place.


These little screws are everywhere.  Like that’s a bad thing…


More screws.


The heat sink is split into two sections, one for each channel.  They need to come loose from the chassis as well.


This aluminum block bridges the tops of the heat sinks to add strength and rigidity to this unit.  Nice!


OK, the main board is out of the chassis.


Interestingly, some other version of this amplifier uses more electrolytic capacitors.  In this version, the pads are jumpered.


Turning the board over, the solder joints to be cleared are ‘marked’ with some rosin solder flux so I can find them if I look away to grab the soldering iron and braid.  Yes, I’ve unsoldered the wrong solder joints in the past.


The old caps at the top of the picture are out and the holes in the PCB are cleared.


Meanwhile, back at the ranch, we will remove the captive line cord and add the IEC connector here.


This cord has 14AWG conductors in it.  A matching large molded IEC power cord will be supplied with this unit when it is returned to the customer.


Here is our new IEC male socket.  Some of these come with flange ears, but spacing on the rear panel is too tight to allow the use of one of those.  This one snaps into place.


This looks a little rough, but this is the approximate outline of the rectangular cutout for the new IEC connector.


While we are hatchet-ing on the rear panel, these magnets will catch any chips or bits of steel removed from the hole.


Here is the outside view of the first trial fit.


And this is what it looks like on the inside.  This IEC socket snaps into the hole, so the hole size needs to be right.


Here is the new IEC socket wired into place.


And this is the closeup of the finished installation.  That silver thing next to the CE mark is a ground point.  I temporarily removed the thumb screw while grinding on the chassis.  It goes back on the unit next.


Now it’s time to reassemble.  Screws, anyone?


Glad I took all those pictures of where these wires went!


The unit is now reassembled.


Here, the terminal block outputs are tested at 250 watts.  So far, so good!


The Neutrik connectors are tested next at 750 watts per channel.  All is well!


Thanks for reading all the way to the end!

CONTACT – David Latchaw EE
281-636-8626

Ampeg BA115 Bass Amp Falling Apart (Literally)

Back in August of 2017, one of these combo bass amps came through the Unbrokenstring Shop with cracked solder joints, which were probably a result of brittle lead-free (RoHS) solder on the circuit board.  The owner of this Ampeg saw that post and called up the Unbrokenstring Crew to ask if this amp could be fixed as well.  Here we go!

Disassembly and reassembly of the combo amp is exactly the same as was performed on the earlier post.  Here, we are starting this blog post with just the chassis on the bench.


Name, Rank, and Serial Number, please!


From above, everything appears to be as it should be.  No wires are hanging loose as was seen in the amp serviced in August, 2017.


But once the circuit board was removed from the chassis, this rotary switch came loose from the circuit board!


As was seen in the other repair, the metallurgy involved with the soldering process was to blame.  In addition, in my opinion, this switch was not the exact part that matches the footprint on the circuit board.  Note that the pins are bent inward to the center of the switch.


These pins are plated in gold.  This is a good thing for the component, but gold, in solution with molten solder (yes, the metals mix) makes the resulting solder joint brittle.  Here, some activated rosin flux is added to the gold plated pins to prepare them for a coat of tin-lead (non-RoHS) solder.


Tinning is complete.  In this picture, we can see the intentional bending of the legs to match the holes on the circuit board.


This is a high quality part, and works well in this application.  However, the manufacturing engineer at SLM was off his/her game that day.


Our new solder joints will probably outlast the amplifier.


No parts were required for this repair, only labor.  This unit plays 100% now!

See the previous Ampeg 115 post for reassembly.

Thanks for reading all the way to the end!

CONTACT – David Latchaw EE
281-636-8626

Intermittent Fender Acoustasonic 150

A fellow musician gave Charles this amp, which was nice gesture.  However, the friend said that it was intermittent.  Could the Unbrokenstring Crew turn this gesture into a reliable amp?

Styled as a unit from the Fender Brownface era, the exterior certainly checks all the boxes for Brownface goodness, with the Correct knobs and silk-screened front panel true to the archetype.  One channel is reserved for an instrument, and the other channel is tailored to vocal performance, including a dual XLR/quarter inch jack for a microphone.


No metal shredders allowed.  This unit has a tweeter, and an electronic gain structure that does not distort.  Just the thing for Charles’ acoustic act.  This badge still has the protective plastic in place.


The speaker cabinet is sealed.  This polarized connector keeps three pairs of audio signals from the amp going to the correct loudspeaker and tweeter.


On the back side, we find the ON/OFF switch and the IEC power socket.  Most of the rear panel is slotted for ventilation.


This is a solid state unit, with plenty of pep to be loud.


The internal architecture permits stereo operation, as is shown by the FX loop connections.  I did not play around with the USB functionality, but it’s in the manual.  We have bigger fish to fry.


Name, rank, and serial number, please.


This circuit board holds all the connectors for Line Out and effects loop functionality, as seen on the rear panel.


This assembly is an AC to DC power supply on the left, and an efficient Class D audio amplifier on the right.


Digital signal processing (DSP) is used to create the reverb and other effects.  The DSP functions are on the mezzanine board on the left.  The thin white cable in the center is the USB cable.  The main printed circuit board handles the clean audio chain and the connections to the front panel controls.  The flat cable on the right brings power from the AC to DC board and sends audio to the amplifier.

A lot of surface-mount components are found in this unit.  Those little cans are electrolytic capacitors; black squares are integrated circuits.  Each of those little black squares does the job of two vacuum tubes.  I feel old and obsolete.


The check mark probably means that someone tested this at the factory, I guess.


So the audio processing hardware is seen at the top of the picture and the power stuff is at the bottom.


The AC wiring comes from the switch directly to the circuit board, where there are filters and a fuse.


This power stuff is actually a switching power supply, which efficiently creates the various operating voltages.


If you look closely at the gold rings on the circuit board, you will see solder that looks ‘strange.’  It does.  Gold atoms mix into the molten tin/lead alloy while the solder joint is in the liquid state.  The gold makes the solder brittle.


The entire circuit board is gold plated.  This plating is among the flattest finishes available for bare circuit boards, perfect for surface mount technology (SMT) components but is a metallurgical compromise for thru-hole components..


As you can see, for thru-hole technology components such as these pins sticking through the board, the results of the soldering action can leave something to be desired.  Do you see the holes in the solder joints?


Now that those holes are fixed, we can focus on the real source of the intermittent operation.  Do you see that light blue resistor with two red stripes hiding behind the capacitor and the heat sink?


That light blue resistor was soldered here.  Or to be more precise, it was soldered there at one time.  The cracked solder joints became intermittent conductors.  Here I have removed the resistor and cleaned away the old solder in preparation for making a new pair of solder joints, free of gold contamination.


Another issue with this amp is that someone has been playing with the loudspeakers.


This loudspeaker fits the cabinet perfectly, but electrically, it is a 40 ohm (yes, forty ohm) loudspeaker, designed for use in a public address paging system (you know, that mess that you hear at the doctor’s office playing MUZAK, mercifully interrupted by an announcement for someone to call a telephone extension?  Yeah, that.)


The Correct part is available.


Who would have thought that you could actually replace a bad loudspeaker with a new one of the correct type?


Do you like those TV shows where they have a build-up to the ‘Big Reveal’?  I don’t either.


Fortunately, we have the correct part and are ready to install it.


Once we replace the grille, you will never know the difference.


See, I told you that you couldn’t tell the difference.  This unit plays beautiful music and the functionality is solid.


Support this musician, winner of a Texas Music Magazine 2018 Album of the Year:  http://www.charlesbryantmusic.com/


Thanks for reading all the way to the end!

CONTACT – David Latchaw EE
281-636-8626


Ampeg B2-RE Bass Amp Gets New EQ Potentiometers

Bass players use SERIOUS hardware, and this Ampeg B2-RE is a serious, heavy, high-end bass amp.  So why in the world does Ampeg use those tiny little plastic slide pots for the equalizer controls?  The Unbrokenstring Crew digs in.

Ampeg is a name that needs no introduction nor elaboration.


Three of the plastic handles are broken off.


A tour of the rear panel shows the cooling fan, the quarter-inch speaker jacks and Neutrik jacks for output power.


The preamp and power amp can be separated using these jacks,  An effects loop is nice, and a balanced output for the poor sot in the control room is a nice touch.  The balanced output has a switchable attenuator.


A look inside shows a big green circuit board that handles the power amp duties.  This view is dominated by the toroidal power transformer on the right.  The ribbon cable on the left carries power to and signals from the preamp board.


And here is the preamp board.  Interesting, the slice potentiometers for the EQ are located on their own circuit board on the left side of this picture.


The preamp board needs to come out to get to the slide pots.  This end of the cable comes loose easily.


Screws hold the preamp board in place in the chassis.


All the knobs come off, as well as the nuts beneath them.


The input jack has its own nut and washer.


While we’re here, an inspection of the unit reveals a solder joint on the path to failing.  This is an easy fix.


The slide potentiometers used by Ampeg are special for a couple of reasons.  One reason is, they have this nice vinyl flap over the slot that helps keep dust out of the internals of the potentiometer.


The potentiometer board is held down with these screws and brackets.  This needs to come apart next.


The other thing that makes these slide potentiometers special is that they use three legs to attach to the circuit board.


Here is the exact part number that needs to be specified when purchasing replacements.


A similar part is available from other sources, but if you look closely, the ‘pin-out’ does not match.  The correct part is in the foreground, and the ‘new’ incompatible part is seen in the background, with the ‘1736’ marking, which is probably a date code of year = 2017 week = 36.


I was curious if the slider and handle could be removed from the new parts and substituted into the old pots.


The interior view of the slide pot.  The black plastic thingie with the fingers, on the left, is the wiper, and the black strip on the right is the resistive element.  The fingers slide along the resistive element to achieve the variable resistor function.


Oh, drat.  The sliders are a different thickness.  We won’t be able to use the new parts to repair the old controls.


So, a week later, a batch of the new controls come in.  We are going to change them all out.


What do you think, folks?  Should I clean up the front panel and remove all these presets?


The new parts are installed.


The workmanship appears to be pretty good, if I do say so myself!


Back on the air, this Ampeg is ready to really rumble through its four hour burn-in!

Thanks for reading all the way to the end!

CONTACT – David Latchaw EE
281-636-8626

Peavey MKIII Bass Head Needs Un-Smoked

This solid state Peavey Bass head is also capable of handling mixer, equalization, and preamp roles for public address, monitor, and other sound reinforcement roles.  But power amp quit!  Can the Unbrokenstring Crew help?

The AutoMix function that Peavey developed has been discussed elsewhere in the blog.  Lots of EQ knobs here!


Note the graphical EQ and bi-amp capability.


Woah!  An Instrument System!  Ooh.  Aah.


On the rear panel is the power switch and speaker connections.


Peavey mixes and matches front panels (inputs, preamp, eq) and rear panels (ps, power amp) to build different heads.


As is the case with many pieces of electronics, the City of Los Angeles Fire Department approves this unit!


Name, rank, and serial number, please.


The blue circuit board at the top is for connections to the power transistors.  The I/O connections are to the left and the power supply filter caps are seen here.


More blue boards at the top, for power transistors.  Driver transistors are found on the square heat sinks.  Do you see the problem yet?


This circuitry is all preamp and tone circuitry.


This sucker got HOT!


The worst damage was to components that were near the root cause.  They burned because the transistor on the aluminum heat sink suffered an internal short circuit.


The heat of the electrical fault was high enough to melt solder, which happens around 650 deg. F.


A matched set of driver transistors were installed and the circuit board cleaned.  The destroyed components to the right have been removed and will be replaced.


The new parts are mounted just above the circuit board.  We can get flame-proof resistors now, unlike when the unit was built with in the 1970s.


More collateral damage was found on one of the blue boards.  This solder trace acted as a fuse at its narrowest point.


The circuit board is now cleaned up and the gap is bridged with a bit of 16awg solid copper wire.


Some of the power transistors were shorted as well, so all of them are now replaced with a matched set of eight.


These parts are still made by ON Semiconductor, the heir apparent to the Motorola semiconductor product line.


The electronics are back together.  The filter capacitors are original, but are still in great shape, so they remain in service.


And, of course, after all the components and circuit boards are in flames, the fuse finally does its job.  Of course.


With a new fuse, the electronics are connected again and initial tests begin!


This unit is back on the air!  This unit is almost hifi sound quality, with endless bottom end.  Good Job Peavey!

Thanks for reading all the way to the end!

CONTACT – David Latchaw EE
281-636-8626

Peavey 260 Booster Amp Needs a Boost

A local church has a rack of Peavey gear that drives their public address system.  This unit had failed.  A phone call to The Unbrokenstring Crew was all that was needed to get this unit onto the operating table.
Unlike a traditional guitar amp or stand-alone amplifier, this unit takes high level signals and buffers it to the loudspeakers.  They are often used as a means to fill in or expand the coverage of an existing system.


And the inputs are daisy-chain-able.

This is, of course, the volume knob.


Here is a tour of the rear panel.  The power switch is ‘center-off’ and, on this unit, does not switch the chassis ground to connect to one side or the other of the AC power line.


No tour of a rear panel is complete without a high-rez pic of the power cord.


And the name/rank/serial number part of our tour.


The AC line fuse was popped.


This is, correctly, a five amp slow blow unit.


Removing the front and rear panels permit access to all the electronics.


The chassis is attached to the rear panel of the unit.  Surprisingly, the power transformer is NOT fastened to the wooden cabinet, but is also attached to the rear panel.


These filter capacitors are good and will not be replaced.


This unit has a shorted rectifier.  New parts were secured, and are shown here.  Although only one rectifier is bad, the other three are the same age and have experienced the same abuse, so they will all be replaced.


The new rectifiers are installed.


Funny thing is, the new fuse looks a whole lot like the old fuse, except it is not all exploded and burned and stuff.


The output from my radio is amplified to a larger signal using my Marshall Stack, to drive the input of the amp at the proper level.


This was the point when the neighbors called the cops to complain of the noise.

Thanks for reading all the way to the end!

CONTACT – David Latchaw EE
281-636-8626

Behringer Ultrabass BX4500H Bass Head Needs a New Fan

Billy said that this unit worked very well until it overheated and shut down after about an hour and a half of use.  He also didn’t hear the fan run.  Could something this simple be all that is wrong with this bass head?

The Unbrokenstring Crew operated this unit for an hour and verified that it overheated and shut down, as it should.


Here is a tour of the rear panel.  The power switch is in the back of the unit.


I really like the Neutrik Speak-On connectors for power at this level.  The 1/4th inch plugs could be operated above their data sheet limits for current and voltage if used at the 450 watt level.


We’ve removed the top of the unit.  Removing the finger guard lets us verify that the fan itself is completely locked up.


To get to the fan, we need to remove the heat sink assembly, which is held in place with these screws on the bottom.


This pic just allows us to keep the wiring straight for reassembly.  This circuit board handles the power output duties.


The fan is bolted to the end of the heat sink assembly.  The power amp is also attached to the whole stack.


We need these specs in order to specify a replacement.


This power cable is specific to the mating connector on the circuit board that supplies the 24v for the fan.  We need to keep this and transfer it to the new fan.


There is a chance that we can remove the whole cable assembly from the old fan and move it to the new fan.


The new fan has three wires.  The third wire is probably a tachometer output so that the speed of the  fan can be known.


The wires on the new fan are soldered to the fan with lap joints.


So, we can make new lap joints when moving the old cable to the new fan.  I’ve got a good feeling about this.


The new fan is bolted back on the stack and the whole arrangement is put back together.


This amp ran for four hours continuously until the neighbors called the cops complaining of a noise ordinance violation.  I believe that the overheating problem is fixed!

Thanks for reading all the way to the end!

CONTACT – David Latchaw EE
281-636-8626

Intermittent Ashdown EVO III 500 Bass Head

This head was soldiering away in the studio when the output signal became distorted.  Can the Unbrokenstring Crew un-distort the output and keep it from happening again?

Stock photo credit: Ashdown Engineering


Name, rank and serial number, please.


The oscilloscope shows the waveform presented across an eight ohm resistive load.  A sinewave is applied to the input jack.  We should have a sinewave here.  But we don’t.  This gives us something to work on!


Oops!  As soon as we touch the chassis, the output waveform changes!


Since we’re on a roll, let’s touch it again!  This is what we should have seen all along.  I think we know where to look.


You might be surprised to know that the big metal heat sink I was touching has a high voltage on it.  So here I am safely draining the high voltage before I touch it and get shocked.  Like in the previous picture.


I wish the heat sink was as well-supported as the rest of the circuit boards.


This whole assembly is attached to the circuit board on the bottom.  Out it comes!


Can you see the problem?  Me neither.


Close examination reveals cracked solder joints.


The correct repair for a cracked solder joint is to remove everything and replace the joint with fresh tin/lead solder.


This is a good solder joint, if I do say so myself.


Further examination reveals more cracked solder joints.  Guess what we’re going to do to these?


This little yellow grabber tool is handy to install screws in tight recesses.


Time to crank it up!

Thanks for reading all the way to the end!

CONTACT – David Latchaw EE
281-636-8626