Epiphone Les Paul LP-100 Checkout

EPI01 Another Stolen Guitar
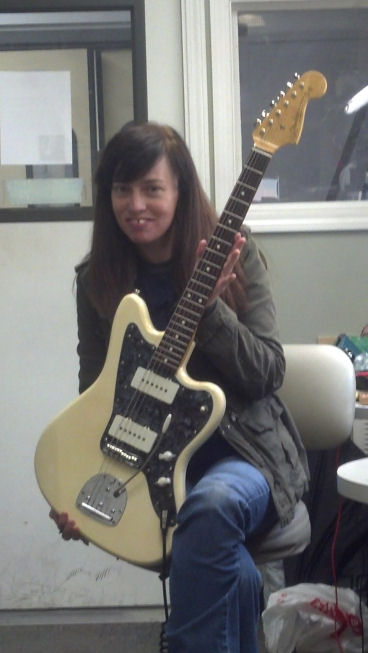
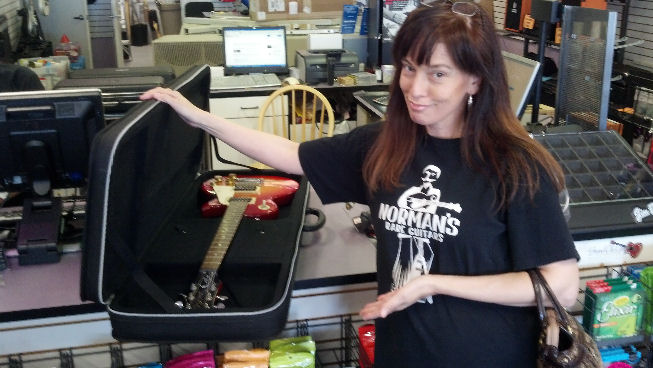
Jennifer found this stunning Epiphone Les Paul at a local music store.  They didn’t know what they had!  Let’s clean it up.

EPI02 DestringThe only issues I can see are that the pick guard is white but the other parts are ivory.  The nut is probably polycarbonate.  All the other hardware and pieces appear to be pretty good stuff!  Off come the strings.
EPI03 Headstock Is A MessOne of my pet peeves is long, dangly string ends.  Why can’t people watch a few YouTube videos and make their guitars a little less dangerous?
EPI04 Hardware1
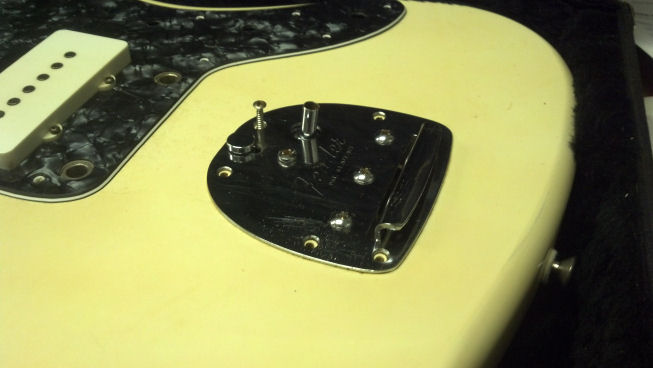
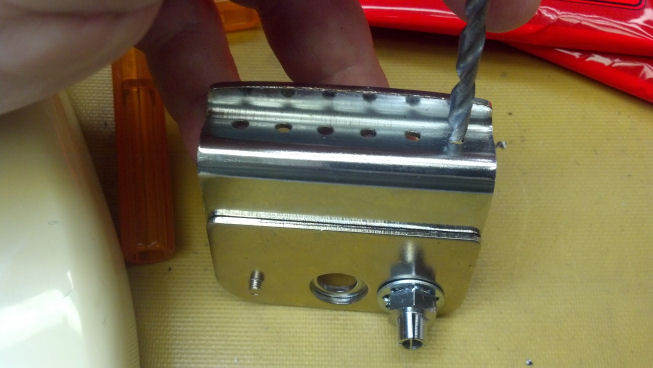
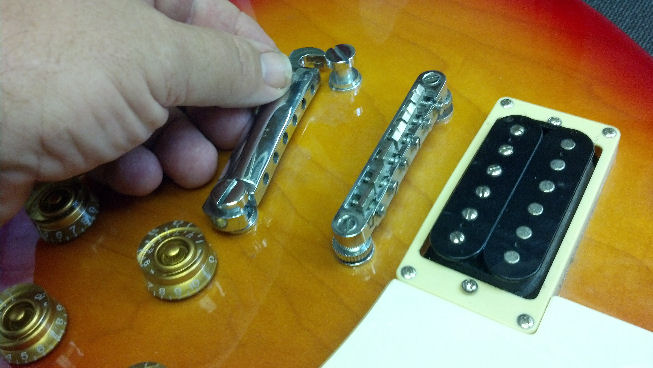
The tail piece is branded Epiphone and is steel.The bridge is steel as well, also branded Epiphone.  String saddles are steel.  Everything here is in good shape.Jen wanted to remove the pick guard.  It didn’t match, and she likes the Studio ethos of a Les Paul sans pick guard.I have been told that this is called a pickguardodectomy.  From this view, you can see the mismatch of colors.My guess is, this guitar has never been polished since it left the factory. The finish is otherwise in great shape!The knobs were not cracked and were not stuck on the pot shafts. The nuts were tight.The neck pickup had been screwed way down, but was functional at the music store.  Here, I’m temporarily removing it so we can clean up everything.
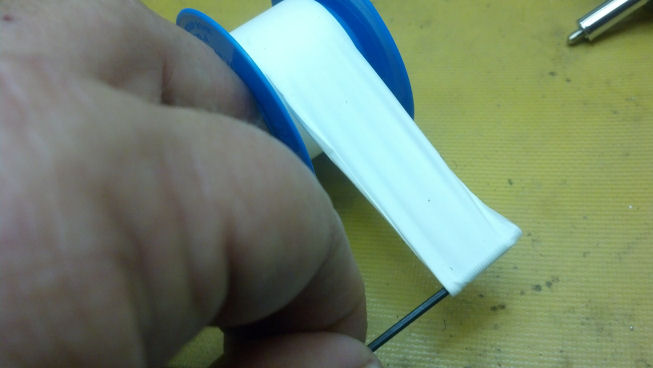
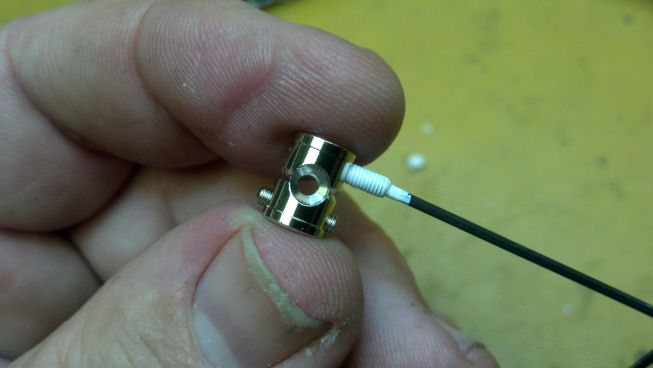
The saddle studs were very loose in their holes, so I bushed up both of them with half-inch Teflon tape.I checked the electronics.  Everything was functional at the music store. I removed the covers to remove gunk and better polish the finish.  This switch is 100%.The jack is like-new. Again, I removed the cover to better polish the finish. Note the more-than-adequate service loop. I wish more guitar companies did this, but, alas, copper wire costs money. Thus, you can always be assured that you won’t get any more than necessary. But this Epiphone is a welcome change from the norm.
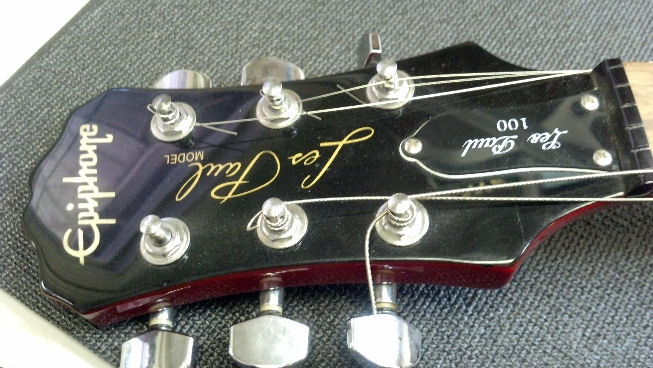
The bushings on the top side of the tuners were not even finger tight. I’ll take this opportunity to pull off the hardware and polish the headstock.The entire neck is finished. Here are some cryptic marks on masking tape for you to decipher.True to the Les Paul formula, this body appears to be mahogany with a maple top.After I installed the neck, I noticed that the badge on the headstock appears to be an inlay, perhaps synthetic abalone.
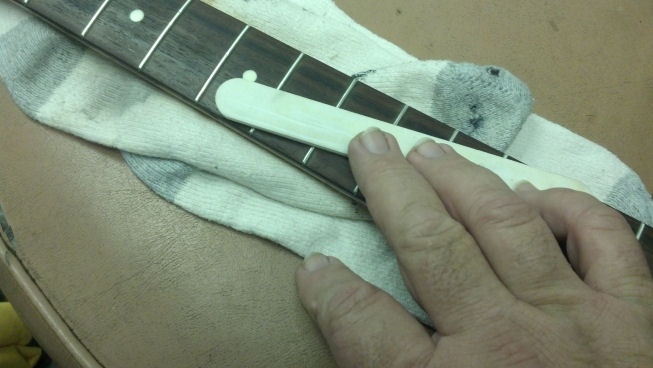
The front of the body is done and is ready for strings. The neck got the usual fret polish and cleaning. The fret board was filthy, taking three applications of Dr. Duck’s to bring it back to life.The back is absolutely perfect, no buckle rash or any signs of chips or damage.
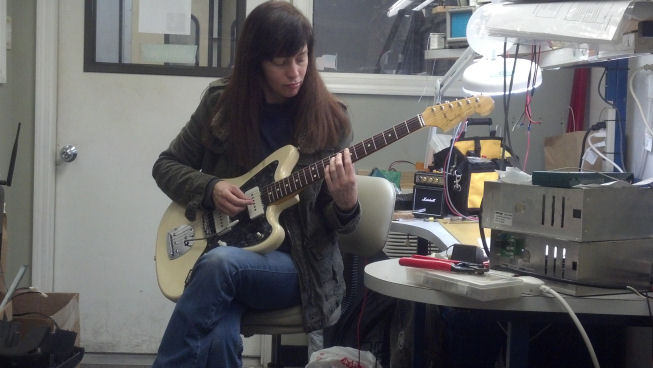
Strung, tuned, truss-rodded, string-heighted, intonated, played.  Jen found a real winner here!Welcome to the Les Paul Zone!

The Battery Leaked in this Electronic Tuner

I picked up a stack of these for ten bucks at a local music store.  They were all returned by customers who had problems with them.  Figuring a guitarist can’t have too many tuners, I sorted through them and got them all running.  Except this one:

The battery had leaked.  The ‘stuff’ that makes alkaline batteries work is (wait, wait, get ready for this…) alkaline in nature.  The caustic stuff, left on cadmium plated iron, was too much and the iron rusted.

Pretty nasty stuff.  Applying power directly to the circuit board, this tuner worked, so all I had to do was fabricate a new battery terminal.

This is a nickel-steel B string from an electric guitar.  It was too short to use anyway, but would be just fine as a springy, solder-able raw material to fabricate a new battery terminal.

With a little fiddling, I got it about the right shape and size.  Here, my handiwork is compared to the undamaged terminal at the other end of the battery stack.  My new terminal was shaped (crudely) as a cone-shaped spring, or close enough.

Here, we’re checking the newly-repurposed B string for a fit into the slot that will hold it when the batteries are installed.

The new battery terminal will be soldered to both sides of the circuit board here.

This is the solder joint on the other side of the board.

I think this crazy idea might actually work!

Tiny Phillips screws hold the circuit board against the LCD.  Connections to the LCD are made with Zebra strips.  What’s a Zebra strip?  Google it, if you’re interested.  And it has nothing to do with animals.

A fresh set of batteries are installed and the unit is checked.  WooHooo!

I had enough of these repaired that I gave them to other musicians, and I kept one in the guitar setup tool box as a spare.

This post just reinforces the old story about the electrical engineer who is the only person in town who will pull a five dollar transistor radio out of the trash and spend all day fixing it.  This project rates right up there with the transistor radio project, but at least it didn’t take all day!  I thought it was fun.

CONTACT INFORMATION – David Latchaw EE    281-636-8626

Gibson C-O Classical Guitar Update

Gibson Guitars produced a half-dozen or so classical guitar models from 1957 to 1971.  By classical guitar, I imply acoustic guitar with nylon strings, a two inch wide neck, round sound hole, and a flat or nearly flat soundboard and back.  Here’s a time capsule, from my childhood:

On a cold winter’s night in 2013, I opened the original hard shell case cradling one of the early musical loves of my life for the first time in probably thirty five years.  It was time for this beautiful guitar to sing again!

To paraphrase Andre Segovia, “There is no guitar but Hauser, and Augustine are his strings!”  A pack of once-fresh strings had slept in the case along with a deteriorated elastic capo, some original sales literature, and a few odds and ends, a message in a bottle from 1978. The strings were still sealed and in good shape, so I tried them out.

After stringing up, something in the headstock was buzzing in the key of G.  Examination of the headstock showed that the screws holding the tuning machines were loose.  The screws enter into a fairly thin chunk of the headstock.  Perhaps the wood had shrunken, or, more likely, an over-zealous teenager had put too much torque on the screws.  (That would be me.)  In any case, let’s fix it!

Examination shows that the screw holes are stripped.

As with the Rogue guitar tuner rework in another blog post, I fashioned some thin wedges from small dowel rod to bush up the holes to make them smaller.

The sharpened dowel will go all the way into the bottom of the hole, and will effectively make the hole smaller.

The sharpened dowel is glued into the hole with hide glue, and then knifed-off flush with the headstock.  The finished repair will be invisible as the tuners completely cover the hole.

I took the opportunity to rub down the metal and lubricate everything.  The machine screws allow a tiny bit of gear lash adjustment so now everything runs smoothly.

When this guitar was new, I noticed that the frets appeared to be wire-brushed, with obvious marks parallel with the fret board. String bending is unusual in classical guitar ethos, but soft strings don’t last well on rough fret wires. Time for a fret level and burnish.  These fret wires hadn’t been touched in decades.

Note the ‘fret zero’ next to the nut. The ebony nut is slotted, but the effective slot depth is set by a thicker fret wire.

Fret wires were leveled, crowned, and burnished with steel wool. I didn’t polish them to a really shiny, slick finish, because I want a little ‘grab’ when I fret the nylon strings to stick them down while playing.  This rosewood fret board hasn’t been this clean since the guitar was new back in 1968!

I have no record of the original Gibson classical guitar string gauges.  Modern strings on the simple, uncompensated Melamine bridge saddle yielded unequal note temperament, made even more painfully obvious by these darned electronic tuners. I purchased a stack of bone saddles and went to work.  This saddle was an intermediate attempt to ‘find’ the proper compensation for this particular guitar.  But it’s not pretty.

Here’s another view.  This material is sustainable Vietnamese water buffalo bone.

Another view of the saddle.  The string slots were an experiment, later dropped from the final version.

This is a little simpler approach, and yielded accurate intonation to within a couple of Hertz. See the break angle?

The slight taper and no string slots allows a bit of string-height adjustment of the action, as this saddle can slide a bit from side to side in the bridge slot.  The dark streak across the bottom of the bridge where it is glued to the cedar sound board has always puzzled me.  Perhaps it is a feature of the wood, or a little too much glue at the Gibson factory.  It’s always been there and after almost fifty years, shows no sign of fading.

The light reflecting from the bone highlights the curves filed into the bone to accomplish the intonation.  There is NO comparison between the tone of the Melamine bridge and the bone bridge.  Yes, this sort of an update makes a noticeable difference in the volume and tone of this guitar.

In this view, the final figure of the bone is more apparent.  The top of the bone is split into two diagonal sections.

Jen does a final test of string harmonics versus fretted note.  Those little electronic tuners didn’t exist when this guitar was built, but this Gibson has updated nicely to comprehend modern strings and music technology.

Old guitars, like old horses and old dogs, deserve care and respect.  In return, old guitars will offer up your music in a voice that transcends time and space, and a perspective of history that cannot be replicated with an effect pedal or VST plug-in.  Take care of those old guitars…  they don’t make ’em anymore!

Thanks for reading all the way to the bottom!

CONTACT INFORMATION – David Latchaw  281-636-8626

The Greatly-Hated But Mandatory “About Me” Post

Years ago, a co-worker asked for an e-mail that she could send to her musician friends who were looking for someone to fix their stuff.  I sent this text:

The Unbroken String         David Latchaw, EE

Mainly focused on difficult or unusual repairs on wooden stringed instruments such as guitars and basses, amplifiers of all technologies, sound gear such as mixers, amps, microphones, synths, MIDI, pedal boards, etc.

Consulting by appointment but dumb questions are always free.

Cell phone is:   two eight one – six three six – eight six two six   (spelled out to defeat the phone spam bots)

.

Now retired from professional electronics, I have somewhat better control of my time to focus on my music and supporting the music scene in Southeast Texas.  Working out of the shop in my home, The Unbrokenstring meets up with customers, Craigs-list-style, picking up and returning various bits of gear and equipment.  Everything is done by appointment.

I also make house calls.  Or, maybe I should say rehearsal room calls.  It is a true joy to meet many talented musicians who sometimes need a quick fix or just a second opinion on a setup problem or an intermittent issue that ‘changes’ when the item is hauled off to a service center.

As I said, ‘dumb questions are always free.’  Do not hesitate to send me a text.  If you call and I don’t pick up immediately, please leave a message.  I hate to talk on the phone and attempt to drive my truck.  And if your number is not a number that I recognize, I just assume that it’s someone ignoring the Do Not Call List again and I may not answer it.  But leave a message anyway.  Thanks!

Fender Jazzmaster Refurb

25_FirstCheckoutPassed

This slick Japanese-built Fender Jazzmaster is a fine representative of Fender’s offset-waist solid body designs.

01_Patient

The volume potentiometer for the bridge pickup was open-circuit over part of its range.  The set screws under the bridge were coming loose and the string height would get crazy-low over time.  This guitar also broke high E strings for no apparent reason.  Let’s go to work!

02_Objective

The control on the right, the volume control, has been replaced before.  This is an inexpensive potentiometer, often sold under different hobbyist brand names.  We will continue to disassemble the guitar to look at a couple of other issues.

03_TremoloCleanup1

Years of sweat have gifted us with a bit of rust and staining of the beautiful white finish.  Fortunately, most of this is out of sight!

04_TremoloCleanup2

But I do want to clean up what I can, if for no other reason than to get everything back flat again.  This abrasive stick is making a tiny dent in the rust.

05_TremoloCleanup3

The heavy artillery is brought to bear to get off the really hard-to-clean stuff.  Wish me luck!

06_TremoloCleanup4

The various bits of hardware were polished and waxed.  This is pretty solid now.  Nothing seemed out of the ordinary that would account for strings breaking.  Maybe the problem will show up during setup.

07_PullTheNeck

The neck angle is good on this guitar.  But, off the neck comes, if for no other reason than to clean up this hardware and to focus on the fretboard and fret cleanup away from the pickups.

08_FretDress

The frets are getting a quick dressing and polish.  The fingerboard was dry and soaked up several applications of Dr. Duck’s Axe Wax.  I love that stuff!

09_NeckShim

This is exactly the shim used by the last person who put this guitar back together.  I matched this shim thickness with a leaf of steel from an inexpensive set of feeler gauges from the car parts store.  Also, can you spot the ‘country of origin’ decal on this guitar?

10_TimeToOperate

All the hardware on the lower half of the pick-guard was unbolted, and the pick guard was set to the other side.  The neck pickup controls on a Jazzmaster are small potentiometers set up on a roller-like knob scheme.  Those are 100% and were returned to service as-is.

11_NewPot1

The new control is an Allen-Bradley sealed military control.  As a rule, service people prefer unsealed controls, because they can be cleaned and lubricated.  However, in this case, I decided to go with a sealed, stainless-steel unit, because of the sweat and grime that this guitar has seen over time.

12_NewPot2

As the body of the Allen-Bradley control is stainless steel, it is nearly impossible to get a good solder joint using conventional solder and heat sources used for common electronics.  In this instance, an extra toothed lock washer and a ring lug will make the positive connection between the metal body of the control and the ground buss of the guitar.

13_BridgePickupCheck

Here, I’m magnetically coupling the output signal from an audio signal generator to the bridge pickup to check the proper operation of the new volume control.  The output from the guitar is jacked straight into my new Marshall Stack visible in the background.  Yep, we’re in the Big Time here!

14_NeckPickupCheck

While I’m at it, I am verifying the proper operation of the neck pickup and tone control.  Look ma, no strings!  It’s kinda nice to be able to check out the electronics without having to install all the pick guard screws and a set of strings.

15_NewMustangBridge

Here is the new Mustang bridge. I will put a coating of Teflon tape on the set screws, which should form a mechanical barrier to keep them from vibrating loose, while not locking the screws down hard as would be the case if I were to use Loc-Tite or nail polish.

16_TeflonTape1

This is my trusty roll of Teflon tape, seen in the Guitar Stand blog post.  Great stuff.

17_TeflonTape2

We don’t want Teflon on the pointed end of the set screw, nor over the hex drive end either.

18_TeflonTape3

Threading the screw in from the bottom will leave the Teflon tape ‘out in front’ of the screw, tightening it up enough to keep from moving up into the body of the bridge, and lowering the string height, but will be soft enough to allow adjustment, with the proper tools.

19_TeflonTape4

For the shorter set screws used in the saddles, I cut the Teflon tape in half and started rolling.

20_TeflonTape5

One down, eleven more to go!  These set screws start fully flush with the bottom of the saddle rollers, so they can go in from the top.

21_NewMustangBridgeWithTeflon

This guy is ready to install.  Allowing for time to clean up the fingerprints, this took me about an hour and a half to get to this point.  Let’s string it up!

22_StringCutter1

Oops.  The high E string was cut right in two.  Post-mortem analysis showed that there was a sharp edge on the tremolo hardware where the string ball sits.  Here, I’ve disassembled the tremolo assembly again to get a better look.

23_StringCutter2

Sure enough, there is a very sharp edge on the hole in the tailpiece.  An appropriately-sized twist drill is just right to de-burr the sharp edge. The other string holes were fine.

24_FirstCheckout

I like to have a third party look at my work before the customer sees it, because another set of eyes and ears and hands may show a problem that I overlooked.  Jen gives the Jazzmaster a workout and is having too much fun!

26_HappyCustomer

Doctor Shoen is pleased with the results!  Check out doktorshoen on Soundcloud and check out his current project “The Voltage Drop” on Soundcloud, on Facebook, and in a club near you today!